Hello,
David Jones from Mix Asylum (http://www.mixasylum.co.uk) here again to discuss another valuable production technique that you may not be aware of. Today’s topic is all about Logic Pro 9’s “Amp Designer”, so let’s get to it shall we?
What is “Amp Designer”?
Amp Designer is a process available in Logic Pro 9 that allows a guitar tone (or any tone if you wish), to be shaped so that it has the power and drive of a “real” guitar played through a professional amplifier. Power and depth plays a big part in recordings, so this program allows a dry recorded signal to give the impression it has been recorded through a Marshall Amplifier (or combinations thereof).
When I say “Marshall Amplifier” I mean Logic’s emulation of said amplifier, but do not let that put you off, the difference between a dry and affected signal can give you a vastly different sound (as the sound examples will testify), and will ultimately give you the “sound” you are looking for.
How do I find “Amp Designer”?
Locating Amp Designer is a very simple process and can be found like so:
On your channel strip, press a new insert and go the first option Amps & Pedals>Amp Designer
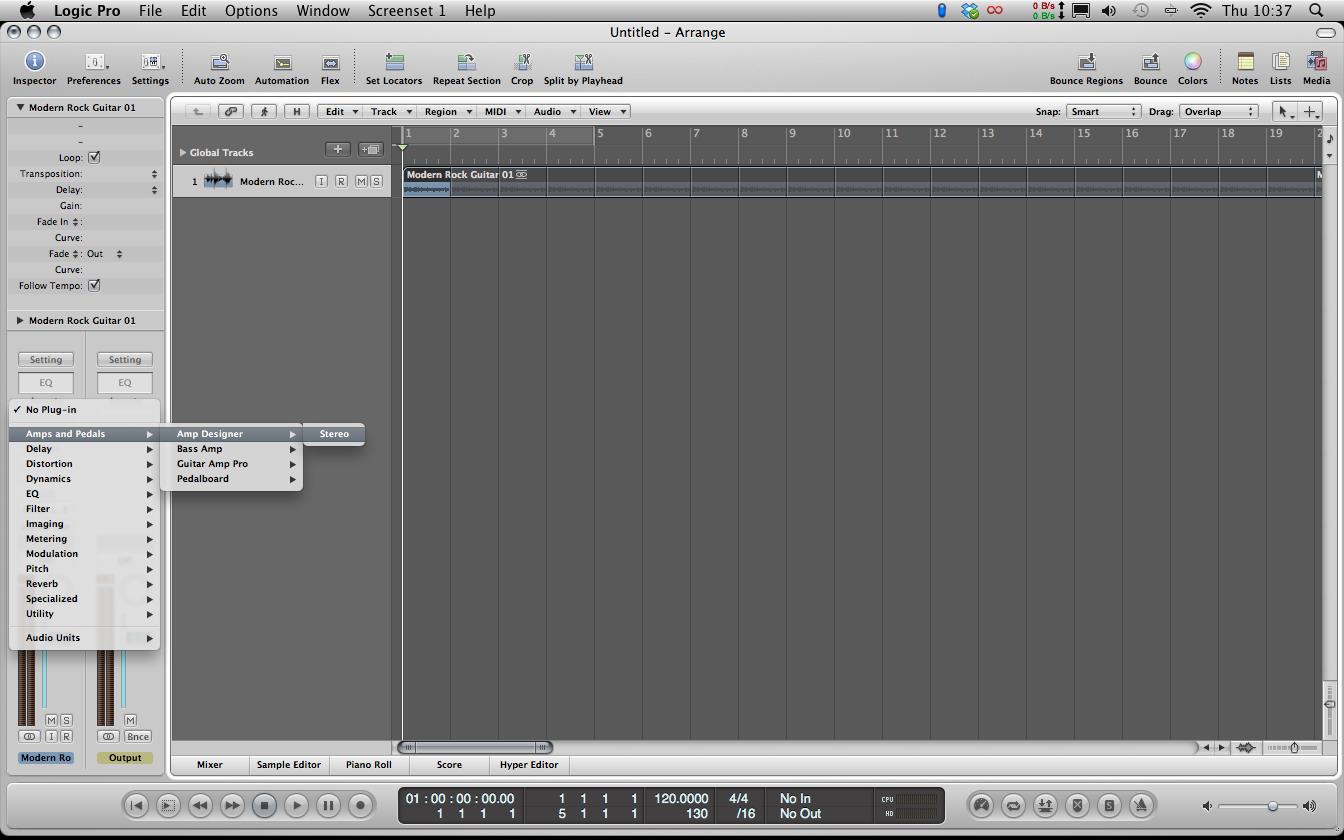
You will now be presented with this view:
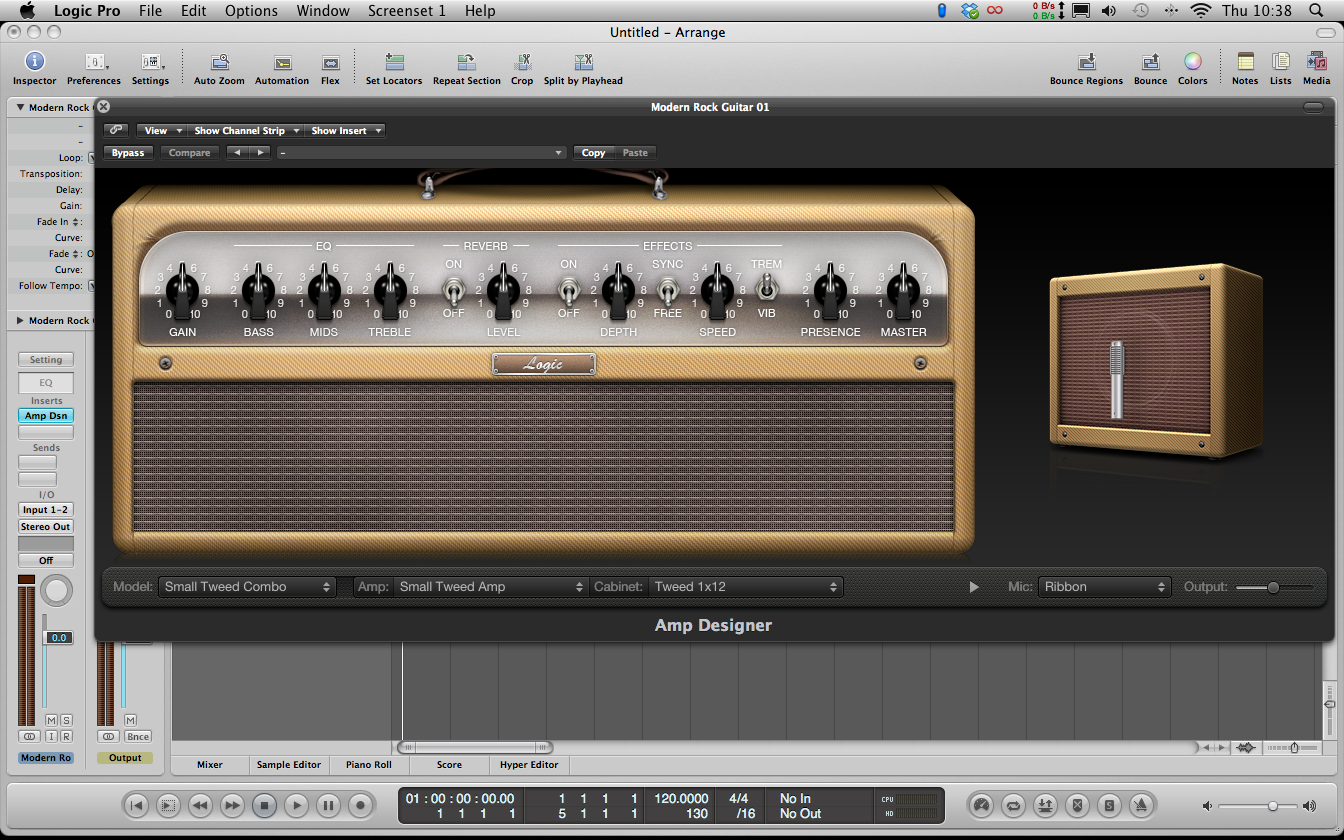
How do I choose what Amplifier to use?
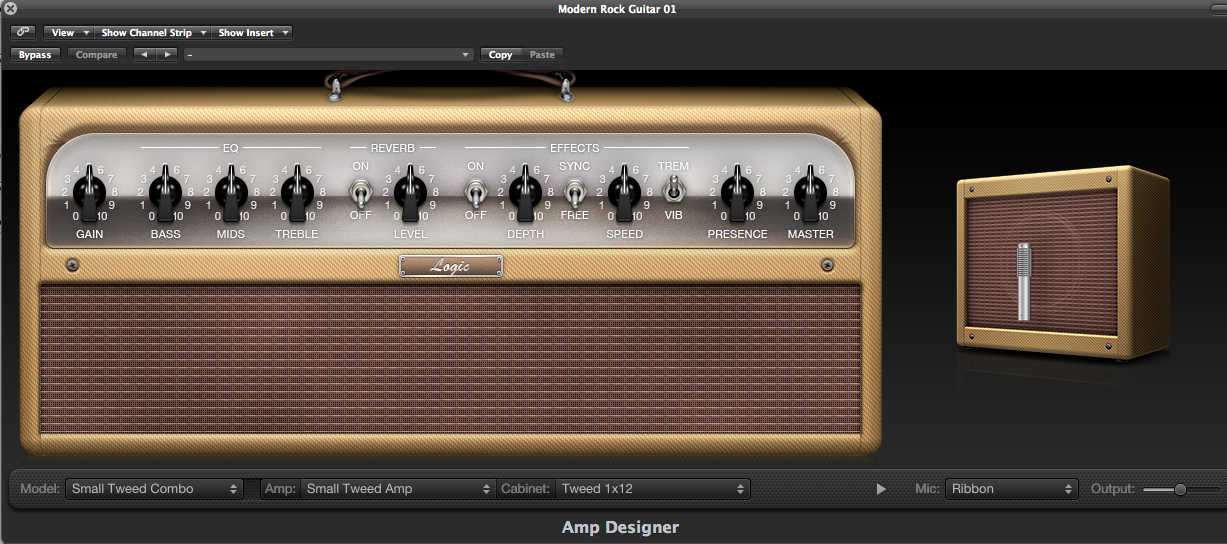
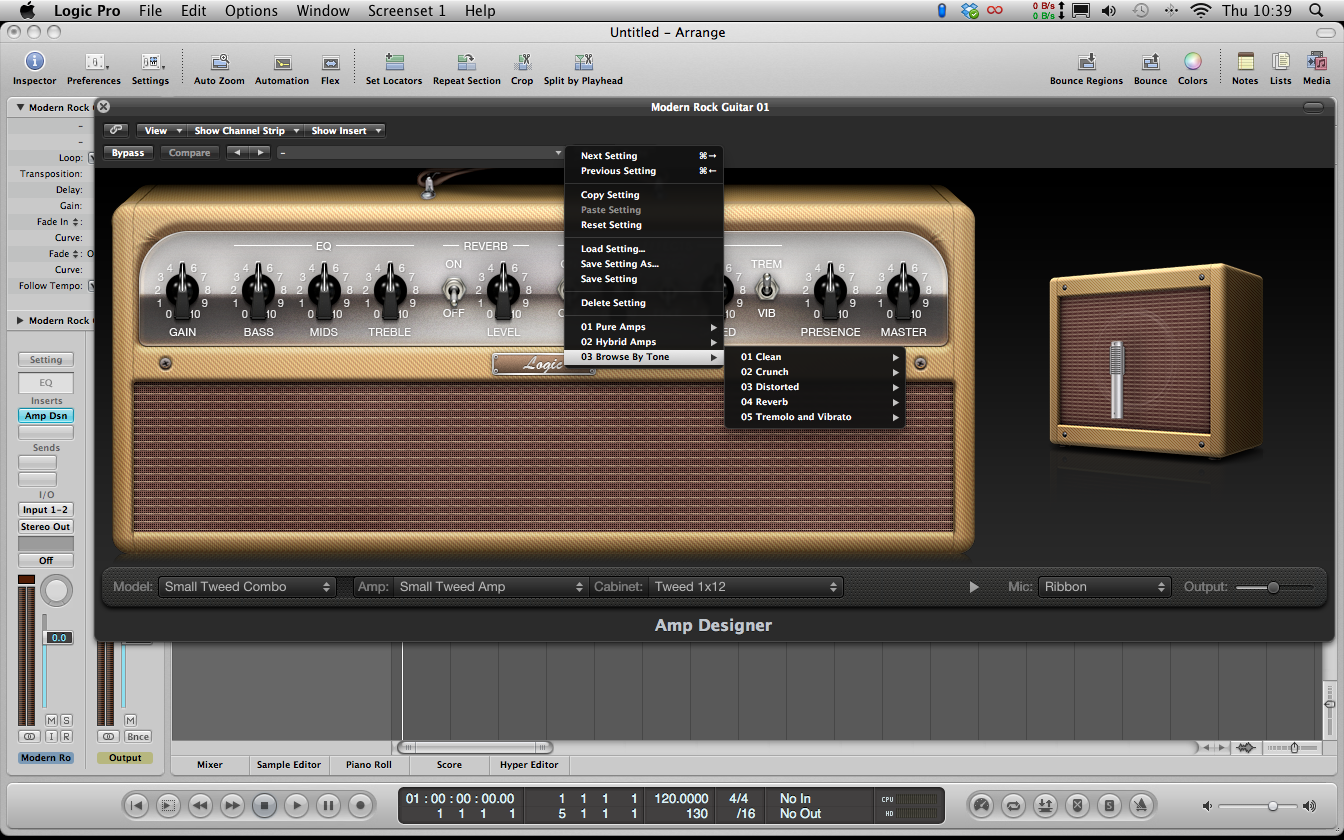
This is just the standard amplifier that is presented (called the “Small Tweed Combo”), which can be easily changed. To explore the many tones which Amp Designer has to offer, simply click on the top pull down menu (Direct left to the ‘Copy’ button).

As you can see, there are many different tones which you can experiment with to get that tone you’re after. There are three categories to choose from and these are:
01: Pure Amps

This category is for 1 tone amplifers (emiting a single sound tone for your signal). These include a “Large Blackface Combo”, a “Sunshine Stack” and many others for a harder type of guitar tone.
02: Hybrid Amps
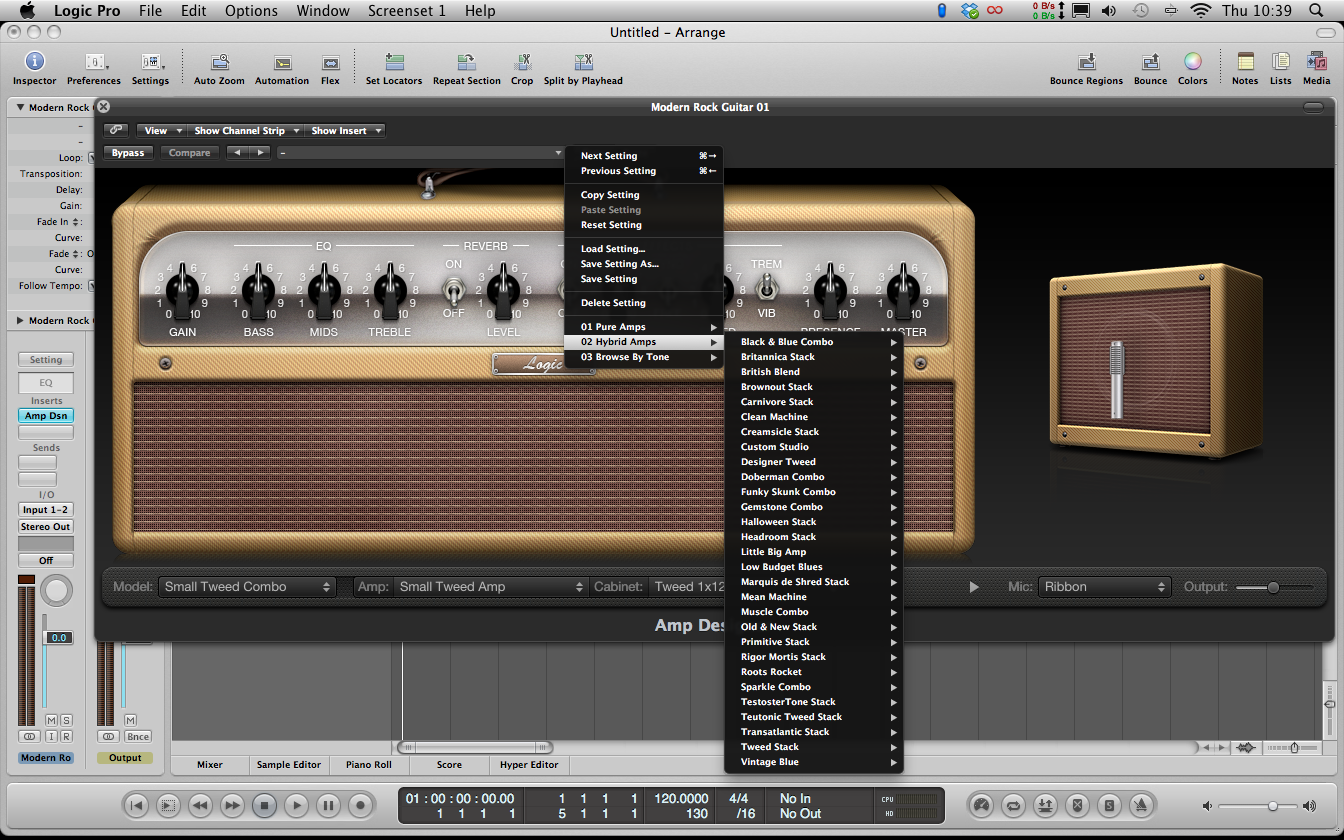 As you might have guessed from the title, this category is for amplifers which have more than one sound characteristic and is more suitable for a cleaner type of tone. Tones in this category include “Clean Machine”, “Old and New Stack” etc.
03: Browse by Tone
If you haven’t already found your ideal sound from either category, the last menu lets a user define their own sound characterstic (such as Clean, Dirty etc), and again choices are presented:
The choice continues however, selecting the tone type is only half the story! When you’ve found your ideal type of amp, you can choose what type of sound you want from it. For example, if I chose ‘Large Blackface Combo’, I could choose different tonal varieties such as Clean, Crunch, Distort etc. This ultimately gives you even more control over how your dry signal will sound. As with anything though, experimentation is key when using technology like this.

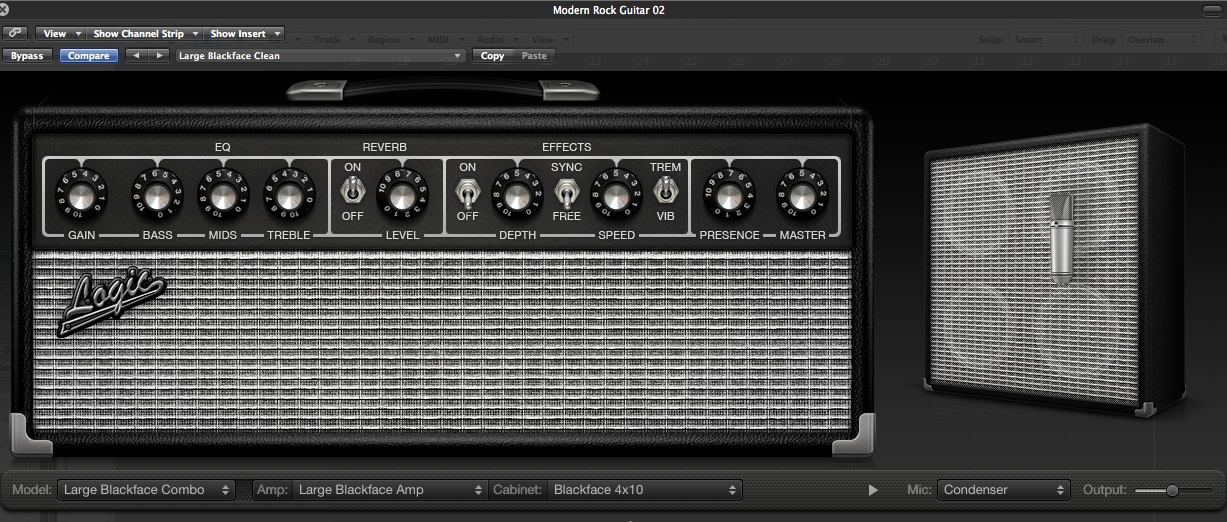
I should probably mention at this point that when you do select a new amplifer, this original interface will change automatically when you click a new choice. The ‘Large Blackface Combo’ amplifer looks like this for example:

How is Amp Designer used in practice?
Now that we’ve discussed how to find the amplifiers, how do we use them to affect our dry signal? For this part of the tutorial, I am going to be using the Large Blackface Combo, but the features mentioned are the same for every amplifier available. These are purely suggestions of using some features. What might be good for someone might not be good for another, so please use discretion.
You will automatically hear a difference in the sound of your signal just by adding a new amplifier to the signal path. If you don’t like what you’re hearing though (but think what you’re using is similar to the sound you want to hear) you can customise the sound of the amp by using one of two (or sometimes both!) methods:
Use the dials on the amplifier
It might sound an obvious solution, but altering some of the dials can radically alter the character of the amp. For example, if you want a grittier sound to your tone, try lessening the ‘treble’ dial of the EQ section, this reduces some of the high frequencies coming into the tone.

If you feel the tone could do with some more ‘space’ and ‘depth’, try adding some reverb to the amp by flicking/clicking the ‘ON’ switch (NOTE – Reverb will not work otherwise) and experimenting with the level.

Change the microphone to alter the amp’s character
Another useful feature of altering the sound characteristic of the amp could be to change the ‘recording’ microphone that is positioned on the amp. You can find this in the ‘Mic’ tab at the bottom half of the Amp Designer screen, and lets you choose between Condenser, Dynamic and Ribbon.


You can also move the position of the microphones, as sometimes a particular cone of an amplifier can have a ‘sweet spot’ as such where the tone is outputted at optimum clarity. Again, please experiment with this (as this will vary for different amps) but to move the microphone position, all you have to do is hover over the name of the microphone and a photo of a speaker cone will appear:

Drag the white dot with your mouse, and the microphone will be moving along the speaker cone. You are limited in that the microphone only moves on the cone it is currently on (i.e. you can’t move it to the speaker cone underneath for example) but this should give you enough sound changing options.

For this example, I have moved the microphone in an extreme position to show you that it moves. Obviously, when doing this for real, experimentation is the key.
The Final Word
I hope this tutorial has given you lots of useful techniques on how to get that ‘perfect’ guitar tone you are after. There is lots of interaction with Amp Designer you can do, so please don’t be scared to try new things. Experimenting is what makes music so interesting!!!
If you want to discuss anything about this blog, please feel free to get in touch with me via email at: techniques-mixasylum@hotmail.co.uk or send a message through my facebook page at http://www.facebook.com/mixasylum
Any feedback is appreciated, good or bad, or even if you’ve got personal tips on how you use Amp Designer, I’d love to hear from you.
Also remember to check out my soundcloud for audio examples of what I’ve just covered in this blog:
https://soundcloud.com/techniques-mixasylum
Thanks, see you next time!
David Jones
Audio Examples
As I just alluded to in the conclusion, my soundcloud account has before and after sound examples of just some of the different amps which are available in Amp Designer. Please check them out and hear for yourself what Amp Designer can do for you!!!
“Large Blackface Combo”
https://soundcloud.com/techniques-mixasylum/logic-pro-amp-designer-sample
“Sunshine Stack”
https://soundcloud.com/techniques-mixasylum/logic-pro-amp-designer-3
“Clean Machine”
https://soundcloud.com/techniques-mixasylum/logic-pro-amp-designer
“Old and New Stack
https://soundcloud.com/techniques-mixasylum/logic-pro-amp-designer-1
“Small Tweed Combo”
https://soundcloud.com/techniques-mixasylum/logic-pro-amp-designer-2

Very helpful, thanks!